



Overlanding has taken self-reliance and off-grid adventure to a new level in the past decade. Go to any overlanding expo, and you’ll see beautifully kitted-out rigs ready for all kinds of wheel-based, “out-there” adventures.
One recent addition to those overland setups I keep seeing? A roof-mounted Starlink.
This tells everyone, “I go to badass places… and still stay connected to the world.” That being said, attaching an expensive piece of equipment like a Starlink to an overlanding roof takes some consideration.
We’ll cover specific mounting requirements overlanders need, why some mounts miss the mark, and the best mounting choice for your rig.
Starlink Mini Mount Requirements for Overland Rigs

When mounting a Starlink Mini, overland rigs pose different mounting challenges compared to your standard house, car, boat, or RV.
Whether it’s miles of washboard roads or technical rock crawling, your overland rig will see some off-roading adventures. And that type of travel has different requirements from standard highway driving.
These are the most important must-have’s for roof-mounting a Starlink to an overlander:
- Secure on rough terrain
- Mounting compatibility with different roofs, including sunroofs, around/inside roof racks, ladders, and metal, aluminum and uneven roofs
- Low-profile design for reducing wind resistance
- Durable against extreme weather
- Easy power cord handling
- Easy to install (and remove!)
- Compact to leave room for other roof-mounted gear, like solar panels or storage boxes
The Biggest Problems With Off-Brand Starlink Mounts
While there are many different Starlink mount options hitting the market these days, finding one that reliably checks all the boxes is a little more challenging.
These are some of the most common issues we’ve found with fly-by-night Starlink mounts.
1. Too Flimsy
A Starlink mount that feels cheap or flimsy doesn’t inspire confidence. A product that costs a little more is worth the money, if it means your Starlink (and connection) stays put.
2. Not Off-Road or Speed Tested
It’s one thing for a product to feel secure, but it’s another for it to be actually tested. (For reference, all of TRIO’s Starlink roof mounts are actually tested, offering reliable speed and wind ratings.)
3. Not Low-Profile
Having a low-profile Starlink mounting solution is especially important for overlanding to keep clearance low and reduce wind drag. Plus, let’s be honest… a sleek, low-profile mount looks way more legit than a bulky mount.
4. Not Engineered for Different Mounting Styles
Overland rigs come in all shapes and sizes, so a mount that only attaches to specific builds won’t work. You need to be sure that your mount can successfully adapt to whatever mounting scenario you throw at it.
5. No Customer Support
If something goes wrong or you’re unsure about mounting compatibility, you want to be able to contact someone. A reliable point of contact for all your mounting questions means you can feel confident about getting exactly what you need.
The Best Starlink Mini Mount for Most Overland Rigs: TRIO Starlink Mini Speedmount
In most cases, the best Starlink mount for overlanding rigs is the TRIO Starlink Mini Speedmount.
The Speedmount is designed specifically with the rugged road user in mind, and is used every single day by everyone from travel enthusiasts, to emergency first responders.

These are some of the features that are especially important for overlanders:
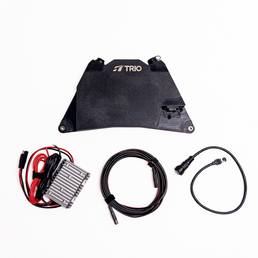
- Secure wraparound casing: TRIO’s Speedmount encases your Starlink in a heavy-duty injection-molded ASA plastic with UV resistance, which offers protection and securely holds the dish in place.
- Low profile: The actual mounted height depends on the mounting option you use, but with through bolting or rubber-coated magnets on the inner frame (the mounted height is less than two inches).
- Tested to 120 mph: The Speedmount is speed-tested on vehicles going up to 120 mph using TRIO’s Rubber-Coated Magnets. That means you can drive in just about any condition while knowing your Starlink isn’t going anywhere.
- Weather resistant: The TRIO Speedmount’s heavy-duty plastic will outlast even your Starlink. This piece of equipment is built to last and withstand all conditions, short of throwing it in a volcano.
- Mounting compatibility: Thanks to six different mounting options, the Speedmount is extremely versatile. TRIO offers accessories to accommodate uneven surfaces and metal or non-metal materials.
- Easy to Install and Remove: The Speedmount’s simple two-piece design easily slides into place and secures with two stainless steel bolts. For more details on mounting, you can follow our step-by-step guide.
Still Looking? When to Use a Different Mount Type for Your Rig
There are a few situations when the TRIO Starlink Mini Speedmount might not be the best choice. So just in case, we have alternative suggestions.
1. Limited Roof Mounting Space or Weight Is a Priority
Use Instead: TRIO Starlink Mini Flatmount

If you only have exactly enough space on your overland roof for the Starlink Mini and not an inch more, you’ll want to use the TRIO Starlink Mini Flatmount. TRIO’s Flatmount uses the connection point from the standard Starlink kickstand to clip into the dish. With the connection entirely under the dish, the mounting takes up less real estate on your roof.
Just keep in mind, the Flatmount is tested to a slightly lower driving speed (75 mph), so you’ll want to weigh the pros and cons of using this with your specific setup.
2. No Roof Rack Space
Use Instead: TRIO Starlink Standard Pole Mount OR TRIO Starlink Mini Interior Mount

If you have absolutely no extra space on your roof rack, you still have mounting options, but it likely won’t be the Speedmount.
Instead, you can use TRIO’s Starlink Standard Pole Mount (note that this is for a Standard Starlink, not a Mini), or a Starlink Mini Interior Mount.
For the pole mount, you can then attach the dish to an integrated ladder or pole on your rig. The Interior Mount attaches on the inside of your rig, so it can mount to a sunroof, fiberglass roof, or front windshield. And if you’re wondering if mounting inside still works for connection, it does.
3. You Mostly Camp in Dense Forests
Use Instead: TRIO Starlink Standard Pole Mount

Does most of your overlanding happen among the trees? Then you may have to get a bit more creative with your Starlink setup. Tree coverage can make getting a clear view of the sky challenging, so there’s a good chance that mounting to your roof won’t always do the trick.
In this case, you can still use a Speedmount, but you may also want the TRIO Starlink Standard Pole Mount to mount your dish to a pole and get it higher above the trees.
Note: The Speedmount frame construction doesn’t block the kickstand connection point, so you can use the Pole Mount without taking off the Speedmount. (A pole mount is also handy for angled boat rigs!)
Keep Your Overland Rig Reliably Connected
Mounting a Starlink mini or standard to your overland roof sound like a new DIY project at first, but with the right Starlink mount and attachments, it doesn't have to be.


