






Plenty of people would rather not leave a Starlink dish sitting outside overnight. Campground rules, weather, or just not wanting to climb up there again.
So we tested it! Using an easy-to-use Starlink Mini window mount, we tried every window type and reported what we could actually connect to.
Can you get Starlink signal inside an RV?
Yeah, you can get signal inside an RV! There just might be a little bit of trial and error. We’ll break it down.
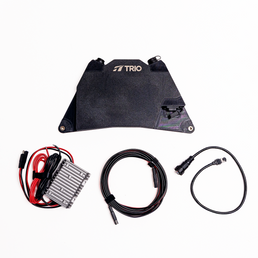
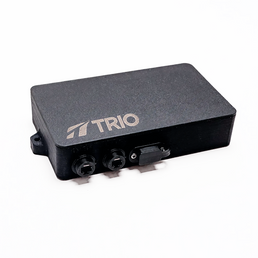
To make indoor Starlink signal possible, we used a TRIO Interior Mount with our Starlink Mini.


We paired them with TRIO Standard suction cups, which allowed easy on-and-off application to various places in the RV.
Setting up an interior Starlink mount
With a TRIO Mini Interior Mount and suction cups, it takes less than ten minutes to get signal inside your RV (and you don’t need any tools).
- Choose a window by where it's facing, not by how big it is.
- Clean the glass properly, since that is where weak seals come from.
- Press each suction cup until it locks, letting the angle-adjusting washers find the curve instead of forcing the mount square. (Protip: Calibrate outside on the first run if you aren’t getting signal.)
- Power your Starlink off a Mini 12V DC Power Cable rather than an inverter, which wastes energy converting DC to AC and back.
- Press the cups before every travel day. Two seconds, and the hold stays strong through washboard roads.
Not connecting? Sync outside first
The first attempt at indoor mounting to an RV windshield didn’t work at all. So we tried syncing it outdoors first.
We took the Starlink Mini outside, held it up to open sky, let it finish its initial calibration out there, and brought it back in. Only after doing that did we get signal indoors, though your mileage will vary.
The orientation of your windshield will matter
Angles are another thing you want to be aware of.
The Starlink Mini reads a cone of sky in front of its face, so whatever the face points at is what the dish sees. Many RV windshields are completely vertical up and down, as opposed to tilted toward the sky.
That geometry problem is probably why so much of the internet has decided interior mounting does not work. People try the windshield, get nothing, then quit. But we got a fairly decent signal after syncing outdoors first, even with a flat windshield.
Windshield not working? Try other interior locations
Of course, if your RV or vehicle has a sunroof or skylight of some kind, you can try mounting it there. Rear-hatch windows are absolutely worth checking, even if they have some type of cover.

This works best with glass surfaces, obviously. But we found that even through some types of plastics and other materials, we were still able to get good-to-great signal.
How good is the signal?
| Location | Download | Upload |
|---|---|---|
| RV windshield (vertical, non-ideal) | ~50 Mbps | ~15 Mbps |
| Prius windshield (while moving) | ~165 Mbps | ~35 Mbps |
| RV rear-hatch window | Near optimal | Near optimal |
You definitely should test out various locations to confirm optimal signal, especially ahead of using any semi-permanent mounting accessories. Luckily, any interior with plastic or glass can have the Starlink repositioned with professional suction cups, or even magnets.
An honest tradeoff
If optimal signal at all costs is the goal, just mount outside. We have a no-drill RV roof install guide that covers all the need-to-know info.
But if you’re extremely worried about the outdoor elements — or even theft — an interior mount is a phenomenal option in a pinch.
If you’re curious about other mounting options for an RV, check out these other easy-to-use mounts.
Frequently asked questions
Does Starlink work through a window?
Yes, on the right window. Our tester got a usable connection through factory RV glass on a vertical side window. Clear, uncoated glass passes the signal fine. Metallic, IR-reflective, or heavily tinted glass will weaken or block it. Look for a purple or bronze shimmer, which usually means a coating.
Can I mount a Starlink Mini on my windshield?
Physically yes, and the Mini Interior Mount is curve-compatible up to 3 degrees. But it was the worst of the three positions tested. Most windshields are raked steeply enough that the dish aims at the road instead of the sky. Use a side window, sunroof, or skylight.
Why won't my Starlink Mini connect after I mount it inside?
Take it outside, hold it up to open sky, and let it complete its initial calibration. Once connected and stable, bring it in and seat it in the mount. This resolves most first-time interior setups.
How much speed do you lose mounting Starlink inside?
Enough to notice. Outside our tester measured about 165 Mbps down and 35 Mbps up. Inside on the best window it was usable but clearly slower. Mount outside for throughput, inside for clearance, security, or a roof you will not drill.
Can I use a Starlink Mini window mount in a car?
Yes. Same physics, and a sunroof or rear hatch window is usually the best glass. One owner runs the Interior Mount on the rear hatch of a Tesla Model Y with strong performance. The windshield has the same rake problem it has in an RV.
Do I need to drill anything to mount Starlink inside a car or RV?
No. The Mini Interior Mount uses two vacuum suction cups with 45 lbs of holding force each, and requires no drilling, adhesive, or permanent modification. It comes off as easily as it goes on.


