


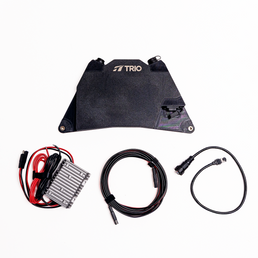

A reliable Starlink Mini installation depends on secure mounting, proper cable management, and hardware designed to withstand variable environments. Trio’s Mini Speedmount is engineered as an ultra–low-profile mounting solution for the Starlink Mini, offering a stable, removable, non-drill alternative for mobile, off-grid, and multi-surface setups.
Starlink’s compact Mini hardware makes it ideal for lightweight connectivity on vehicles, vans, overlanding rigs, boats, and temporary outdoor installations. A mounting system that aligns with the dish’s portability is essential. Trio was among the first to develop non-drill, removable Starlink mounts, drawing from practical engineering, field use, and user-driven feedback.
This guide provides a structured installation process for the Mini Speedmount, covering compatible mounting methods, safety considerations, and best-practice recommendations based on Trio’s hardware design.
Required Tools and Safety Precautions
The Mini Speedmount is designed for straightforward installation. Most users will not require specialized tools.
Tools Needed
-
Included 4 mm hex/Allen key
-
Included screws and hardware (pre-inserted in the frame)
-
Microfiber cloth
-
Optional: isopropyl alcohol wipes (for mounting surface preparation)
Safety Precautions
-
Install the mounting hardware before placing the Starlink Mini into the mount.
-
The low-profile design leaves minimal clearance once the dish is inserted.
-
Ensure all mounting surfaces are clean, smooth, and dry.
-
For magnetic or suction mounts, confirm full contact with the surface.
-
Never use the dish as a lever to remove the mount.
-
Confirm the cable path is unobstructed before tightening hardware.
-
Install with the Starlink Mini oriented toward the trailing edge of the vehicle or mounting surface for proper cable exit.

Step-by-Step Installation Guide for the Mini Speedmount
Step 1: Unboxing and Identifying Parts
Inside your Mini Speedmount kit, you will find:
-
Two Mini Speedmount components
-
2× M6 30 mm stainless steel bolts
-
2× M6 stainless steel Nylock locknuts
-
4 mm hex key for assembly
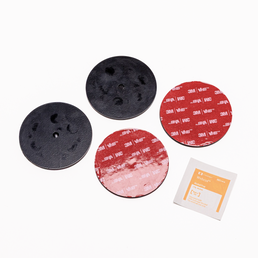
In addition, depending on what you are affixing your Mini Speedmount with, you may have purchased one of the following attachments:
-
Rubber Coated Magnets
-
Suction Cups
-
VHB Landing Pads
-
VHB Discs
Step 2: Install the Mounting Hardware First
Generally speaking, the Mini Speedmount’s low clearance makes it difficult to access screw points once the dish is inserted. So here is when you would attach your chosen mounting system.
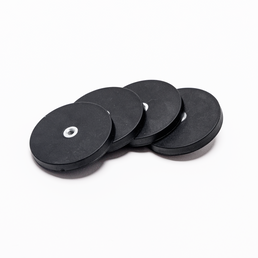
Rubber-Coated Magnets (Recommended for Steel Roofs)
-
Slide each rubber-coated magnet into the designated recesses.
-
Use the included screws to secure them.
-
Ensure each magnet sits flush and free of debris.
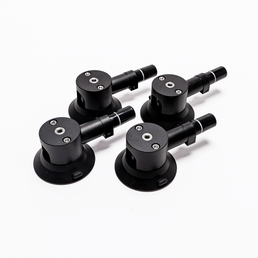
Suction Cups
-
Inspect each suction cup for debris or damage.
-
Clean the mounting surface with isopropyl alcohol.
-
Attach each cup to the mount’s underside.
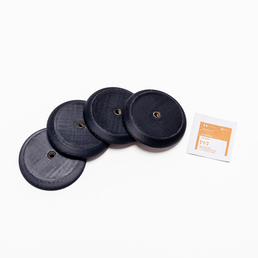
VHB Landing Pads / Adhesive Landing Pads
-
Clean the substrate thoroughly.
-
Optionally scuff the surface (may affect finish).
-
Apply the VHB pads to the mounting feet.
-
Press firmly and allow up to 24 hours for curing.
VHB Discs
-
Stick each disc to a clean, non-porous surface to create a magnetic target.
-
Use only in conjunction with rubber-coated magnets.
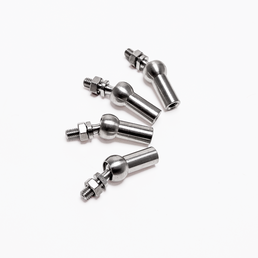
Through-Bolt or Bracket Mounting
-
Use the outer holes to position bolts or brackets.
-
Ensure the bracket or bolt placement provides full contact and even pressure.
Note: If you choose to bolt on your Mini Speedmount, the mount has to be assembled on the Starlink dish prior to installation.
Once the mounting hardware is attached to your Starlink, you can proceed to assemble the frame around the Starlink Mini.
Step 3: Position the Starlink Mini and Align the Cable Port
Place the Starlink Mini into the left frame. Ensure:
-
The dish sits fully inside the molded recess.
-
The ports align with the mount’s opening.
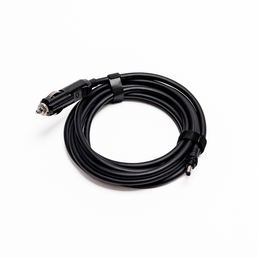
You may route the cable through the bottom opening for rear exit. There's a small cutout for the cable; this way, the Speedmount can sit as low to the surface as possible.
Step 4: Assemble the Two-Piece Frame Around the Dish
Follow these steps:
- Place the right frame on bottom, aligning the bolt holes with the left frame.
-
Insert the M6 bolts through both sides of the frame.
-
Secure with the Nylock locknuts, (already inserted into the Mini Speedmount frame components) tightening evenly using the 4 mm hex key and a wrench.
-
Tighten until snug; do not overtighten.
-
Ensure the dish is held firmly without compression or distortion.
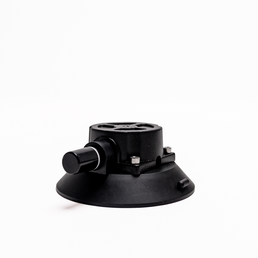
When assembled, the mount forms a rigid, protective enclosure while maintaining the Starlink Mini’s open-face functionality.
Step 5: Mount the Assembled Unit to the Installation Surface
Magnetic Mount Installation
-
Place the unit onto a clean, steel surface.
-
Confirm all magnets achieve full contact. This is important for safety.
-
Verify the cable exits toward the trailing edge of the vehicle or mounting surface.
Suction Cup Installation
-
Press each cup onto the surface.
-
Pump the vacuum mechanism until the indicator band disappears.
-
Recheck suction strength after initial placement and every 24-48 hours thereafter.
VHB Landing Pads & Discs / Adhesive Installation
-
Once adhered, allow 24 hours curing time, which is required for permanent installation.
Through Bolt / Bracket Installation
-
Secure the brackets or bolts to the roof rack, tray, or mounting panel.
-
Confirm even pressure and full seating of the frame.

Troubleshooting and Installation Tips
Frame Not Closing Evenly
-
Confirm the dish is fully seated in the lower frame. Sometimes it needs to be pushed tightly into place.
-
Ensure the upper and lower bolt holes are aligned.
Cable Routing Feels Tight
-
Verify routing through the correct cutout (bottom or side).
-
Avoid sharp bends or strain near the connector. If cutting through a metal roof, watch out for sharp metal edges cutting the cable.
Magnets Not Adhering
-
Surface must be steel; magnets will not adhere to aluminum.
-
For aluminum surfaces, use suction cups, VHB Landing pads, or VHB discs with magnets.
Suction Cups Losing Pressure
-
Clean the cup and mounting substrate.
-
Pump until the indicator is fully retracted.
Note: Suction cups are not a permanent installation; suction cups should be checked every 24-48 hours for optimal safety
Removing the Mount
-
Lift the mount (not the dish) by raising the one edge at a time. It can be helpful to slide horizontally to break initial magnet strength.
-
For suction cups, lift the rubber release tab toward the edge.
- VHB Landing Pads cannot be removed once applied. However, you can unbolt the Speedmount with the included 4mm allen key (hint: some people swap in resistant hardware for extra security!)
For installation-specific questions, Trio’s support team is available for one-on-one assistance.
Mini Speedmount vs. Flatmount: Comparison Chart
|
Attribute |
Mini Speedmount |
Gen 3 Flatmount |
|
Compatible Dish |
Starlink Mini |
Starlink Gen 3 |
|
Profile Height |
Ultra-low (<2 in) |
Low profile |
|
Mounting Options |
Magnets, suction cups, VHB pads, bolts, brackets |
Magnets, VHB landing pads, suction cups, bolts |
|
Design Structure |
Two-piece protective assembly |
Single-piece snap in mount |
|
Cable Routing |
Bottom exit (out of cutout) |
Bottom exit |
|
Removal & Access |
Designed for quick removal of the dish while keeping the Speedmount on the dish (for protection and quick re-mounting) |
Requires sliding the dish horizontally from a fixed base using Release Lever |
|
Ideal Use Cases |
Mobile, frequent repositioning; vans, trucks, temporary setups |
Vans, RVs, boats, semi-permanent installs |
|
Weight Distribution |
Even load around full perimeter, giving most hold-down strength |
Concentrated on center mounting tabs |
|
Handling & Storage |
Compact; easy to transport, protects dish |
Best for fixed placements |
Benefits of the Mini Speedmount
The Mini Speedmount is engineered to support the Starlink Mini’s portability while ensuring stability and secure mounting. Its two-piece protective frame shields the dish edges from impacts and travel-related debris while keeping the Starlink Mini’s surface unobstructed for proper snowmelt and signal performance.
The ultra-low-profile design minimizes wind exposure and debris damage. Multiple mounting options (including rubber-coated magnets, heavy-duty suction cups, VHB Landing Pads, VHB Discs, and through-bolting) provide adaptability across many vehicle types and environments.
The frame can stay installed while the dish is removed, enabling flexible travel, easy repositioning, and efficient setup workflows.
Final Considerations for a Reliable Starlink Mini Installation
A stable, low-profile mounting system is essential (and convenient!) for reliable Starlink Mini performance, especially in mobile or off-grid conditions. Trio’s Mini Speedmount provides a secure, engineered solution that supports multiple mounting configurations without drilling, preserving both portability and structural integrity.
To explore Trio’s full range of Starlink mounts and accessories, visit: Trio Flatmount Collection
For product details or direct purchase: Mini Speedmount
If you need help selecting hardware or planning an installation, Trio offers person-to-person guidance tailored to your setup.
The Mini Speedmount uses a two-piece assembly that clamps around the Starlink Mini, protecting all edges while maintaining low profile and unhindered signal performance. And its two-piece design allows the mount to fully surround and protect the edges of the Starlink Mini, while still leaving the dish surface unobstructed for proper signal performance, snowmelt capability, and heat dissipation.


