





Cellular coverage stops at the edge of civilization. Starlink doesn't.
And for truck owners who regularly operate in areas with no reliable cell signal (you know, remote job sites, backcountry trails, mountain passes, and agricultural land), a roof-mounted Starlink dish is the difference between staying connected versus going fully off the grid.
Here's everything you need to mount Starlink on a truck correctly, including:
-
- What to Know First
- Starlink Truck Mounting Options
- Choosing the Right Mount for Your Truck
- Other Key Considerations
- How to Mount Starlink: Step-by-Step
- Common Mistakes to Avoid
-
Additional FAQs
Protip: Already know what you need? Browse Starlink truck mounts here.
Installing Starlink on a Truck: What to Know First

Are you planning on using your Starlink while driving?
If you’re installing a Starlink onto your truck, you’re probably expecting it to stay put while driving. (If not, ignore the rest of this guide and just use bubble gum… or get a pole mount for stationary use.)
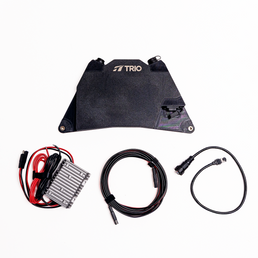
For many truck owners in most scenarios, the TRIO Gen 3 Standard Speedmount ends up being the most practical option.
It’ll easily cover you in most realistic transportation scenarios, and it doesn’t require any drilling, nor are there any tricky steps to set it up.
Plus, it’s extremely safe. When flat-mounted on a truck roof, the standard Gen 3 mount handles triple-digit highway speeds well, all while maintaining a consistent connection, whetherregardless if you’re camping, on a job site, or wherever else. (Multiple real-world installs confirm internet speeds of 80–280 Mbps while driving.)
Protip: Keep in mind that any in-motion use of your Starlink will require the Starlink Roaming plan, which supports speeds up to 100 mph.
What are all my Starlink truck mounting options?
The TRIO Gen 3 Standard Mount is going to cover most trucks in most scenarios. But you should know your other options before you get to mounting!
Flatmounts (Best for Permanent Installs/Low-Speed + Stationary)
-

A Flatmount keeps the dish safe and flush on a roof surface, rated for typical speeds.
It's a low profile, clean solution, albeit with minimal wind resistance, It works on steel, aluminum, fiberglass, and roof rack surfaces (depending on attachment method).
If you're running the dish long-term on a work site or an overland rig like most RVs, this is the one.
In one independent, real-world test, a Starlink using a Gen 3 Standard Flatmount went on a 700-mile road trip from Oregon to Central California with zero service interruption, hitting 278 Mbps in areas with no cellular coverage. (Dish orientation relative to direction of travel doesn't matter, the system manages it.)
Speedmounts (Best for High-Speed Protection with the Starlink Gen 3 & Starlink Mini)


As mentioned above, a Speedmount surrounds all four edges of the dish with a two-piece protective frame. It shields the dish from road debris, branches, and hail, relevant for any truck that regularly drives unpaved roads or through tree cover. Meanwhile, the built-in drainage design prevents water pooling on the surface of the dish.
For Mini-specific installs, the Mini Speedmount works the same way in the shape of the Starlink Mini. Remounting your Starlink when it’s one of these means picking it up and placing it elsewhere, rather than setting up the dish each time. Depending on which attachment you use (more on that later), this can be a breeze.
Interior Mounts

If you have a Starlink Mini and the glass inside your vehicle allows for it, you can forgo elements altogether, provided you are fine with the setup existing inside the cabin with you.
Interior mounts work using suction cups or rubber-coated magnets, so no drilling required (Just remember that temperature swings and surface debris affect the seal over time.)
-

The bigger question with interior mounts is what's between the dish and the sky.
Starlink can see through fiberglass. Plain fiberglass camper shells and canopies (no metal frame, no foil insulation, no embedded mesh) are largely transparent to Starlink's signal. Most truck owners with a standard fiberglass shell report speeds nearly identical to an exterior roof mount. The problem is usually not the fiberglass itself, but the trees, buildings, and limited sky view.
That said, if your connection is already marginal, a little extra attenuation can tip things into occasional dropouts. Easy fix: test before you commit. Set the dish outside on a tripod, then move it inside under the shell and compare speeds in the Starlink app for 10–20 minutes. You'll know fast.
Glass is a different story. Clear, non-metallic glass (e.g., sunroofs, panoramic roofs) usually works fine. But some modern vehicles use glass with metallic or IR-reflective coatings, and those will block the signal entirely. (Cybertruck's roof glass is the most well-known example.) Not sure if your cab glass is coated? Assume it might be, and test first.
DIY Mounts (Not Recommended)
The appeal is obvious: a bracket from a hardware store costs $15. The problem: DIY rigs are not rated for wind load, sustained vibration, or the temperature cycling a truck generates.
DIY installs also invite water intrusion anywhere the roof is cut or compressed, which can damage the dish, the cable connector, or the roof structure itself.
Also know that damage from an improper mount may fall outside Starlink's warranty coverage. It may be $15, but they come with a potentially expensive list of consequences.
-
Mount Type Best For How It Works Things to Know Flatmount
(ex: TRIO Gen 3 Standard Mount)Permanent or semi-permanent vehicle installs Keeps the dish flush with the roof surface for a low-profile setup. Higher wind resistance than Speedmounts. Not recommended for highway speeds without a wind block. Speedmount
(ex: TRIO Gen 3 Speedmount)Off-road, high-speed, or extra protection Surrounds the dish with a protective frame. Built for Starlink Gen 3 or Starlink Mini. Best option for highway driving and high wind. Shields against road debris and branches. Magnetic Mounts Steel roofs Uses rubber-coated magnets to hold the dish to the vehicle. Quick to deploy and useful for testing mount positions. Interior Mounts Glass or smooth fiberglass Uses suction cups to attach the dish temporarily. Best for Starlink Mini. Check suction strength over time (affected by temp/debris). DIY Mounts
(Not Recommended)Experimental/Budget setups Uses custom brackets or hardware store components. Usually not rated for wind load or vibration. Can lead to dish damage or water leaks. Choosing the Best Starlink Mount Based on Your Truck Type
There are a lot of different truck configurations out there. One easy way to narrow down your mounting options is to start with the general type of truck you have.
Here’s a quick reference for the most common setups:
-
Truck Type Best Mount Location Recommended Mount Best Attachment Method Mid-Size Trucks
(Tacoma, Ranger, Colorado, Frontier)Bed rack or roof rack TRIO Mini Speedmount (with Starlink Mini) VHB Landing Pads or magnets (if steel) Full-Size Trucks
(F-150, Silverado, Ram 1500, Tundra)Cab roof or roof rack TRIO Gen 3 Flatmount VHB Landing Pads or VHB Disc & Magnets Heavy-Duty Trucks
(F-250/350, Ram 2500/3500, Silverado)Cab roof TRIO Gen 3 Speedmount VHB Landing Pads or magnets (depending on roof material) Camper Shells / Overland Builds Above the shell or rack TRIO Gen 3 Speedmount VHB Landing Pads or VHB Disc & Magnets
-
Mid-Size Trucks (Tacoma, Ranger, Colorado, Frontier)
 Tacoma
Limited cab roof space makes the bed rack the practical mounting location. Most mid-size trucks use aluminum or composite panels, so check your truck with any regular magnet before buying any magnetic hardware.
Best Option: The Starlink Mini is often the right fit: smaller footprint, lighter, easier to manage on a compact platform.
Full-Size Trucks (F-150, Silverado 1500, Ram 1500, Tundra)
 Ford F-150
Sure, there’s more roof surface area, but if your truck has an aluminum cab, magnets will not hold!
Best Option: A Gen 3 Flatmount with VHB Landing Pads are the best attachment method; watch for uneven roof ribs that break flat contact though! Also, this mount will allow the Starlink cables to route cleanly through the rear sliding window, moonroof gasket, or door jamb seal without any drilling.
Heavy-Duty Trucks (F-250/350, Ram 2500/3500, Silverado 2500/3500)
 RAM 2500
F-250/350 work truck bodies vary between steel and aluminum cabs. Test with a magnet before selecting attachment hardware. Super-duty trucks with upfitter switches give you a clean factory 12V power source without tapping other circuits, which simplifies the power setup considerably.
Best Option: The Gen 3 Speedmount
Trucks With Camper Shells, RTTs, or Overland Builds

The dish needs to be above the shell of your RV. But mounting behind a raised camper means the shell creates a direct obstruction. For safety then, Speedmounts are the way to go.
Regardless of the mount type, you need to make sure you use the Starlink app's obstruction scanner to confirm placement before committing. Cable entry requires more planning here; run through an existing vent or pass-through where possible and seal every opening with Dicor lap sealant.
Best Option: Gen 3 Speedmount
-
Truck Type Best Mount Location Recommended Mount Best Attachment Method Mid-Size Trucks
(Tacoma, Ranger, Colorado, Frontier)Bed rack or roof rack TRIO Mini Speedmount (with Starlink Mini) VHB Landing Pads or magnets (if steel) Full-Size Trucks
(F-150, Silverado, Ram 1500, Tundra)Cab roof or roof rack TRIO Gen 3 Flatmount VHB Landing Pads or VHB Disc & Magnets Heavy-Duty Trucks
(F-250/350, Ram 2500/3500, Silverado)Cab roof TRIO Gen 3 Speedmount VHB Landing Pads or magnets (depending on roof material) Camper Shells / Overland Builds Above the shell or rack TRIO Gen 3 Speedmount VHB Landing Pads or VHB Disc & Magnets
-
Other Key Considerations Before Officially Choosing Your Starlink Mount
Okay, so now you understand what you’ll need.. but that’s all out the window if you’re planning on commuting to the arctic circle!
Here are some additional variables you must consider before making a final hardware decision.
Wind Resistance and Highway Vibration
Truck installs deal with more vibration than stationary or RV setups. Highway speeds, rough roads, and long drives can gradually loosen mounting hardware.
Two simple precautions help avoid problems: keep the mount as low-profile as possible, and use medium-strength threadlocker (such as Loctite 243) on mounting bolts before final tightening.
Vehicle Height and Clearance
A flat-mounted Gen 3 dish adds 1.85 inches of height to the roof. That usually isn’t a problem, but it’s still worth checking against low-clearance hazards like parking structures, loading docks, and drive-throughs.
If the dish is mounted above a camper shell or roof rack, the overall height increases. In those cases, branches and overhead obstacles become a more realistic concern.
Cable Routing and Weatherproofing
Most truck installations can route the Starlink cable without drilling into the vehicle.
Common entry points include:
-
Rear sliding window frames
-
Sunroof or moonroof gaskets
-
Door jamb rubber seals
-
Existing factory grommets behind interior panels
If the cable runs along the exterior of the truck, adding braided cable sleeving helps protect it from UV exposure and road abrasion.
Power Supply Options

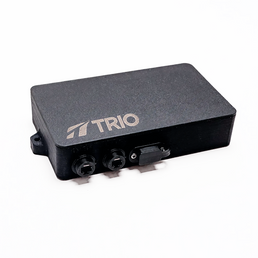
The Starlink Gen 3 system typically draws around 75–100 watts during normal operation and startup, so it’s worth planning the power setup ahead of time.
Most truck installs use one of three approaches:
-
12V DC conversion for the most efficient setup
-
Vehicle 12V outlet for simple installs
-
Battery and inverter systems for off-grid use, though bypassing the inverter and going to direct to battery is most efficient
The best option depends on how long you plan to run Starlink and whether the engine is running! There are different considerations for a typical truck versus an RV or boat, for example. For more product information, go here.
Step-by-Step: How to Install Starlink on a Truck
If you’ve gotten this far, good work!
But if you scrolled down here super fast, at least know this… every Starlink mount install that holds up long-term gets four things right:
-
Roof material confirmed before selecting attachment hardware
-
Mount chosen for the actual load the truck generates
-
Cable routed and sealed against water and abrasion
-
Power delivered without the losses of an unnecessary inverter in the chain
If you're deciding between options, the mount selection guide walks through each configuration in detail. And for Mini-specific installs, the Mini Speedmount installation guide covers the process step by step.
For the full lineup of mounts, attachments, and power accessories, browse the collection here.
Step 1: Choose the Best Mount Location

The biggest requirement is simple: clear sky. The dish needs an unobstructed view upward, usually straight overhead. On most trucks, the rear portion of the cab roof works well. It usually has the clearest view of the sky and stays out of the way of antennas, roof racks, or cargo boxes.
Before you mount anything though, open the Starlink app and use the obstruction scanner. Stand where the dish will sit and scan the sky with your phone. Red areas mean something is blocking the signal, blue means you’re clear. If you see a lot of red, try another location and scan again.
Step 2: Install the Mount Securely

The attachment method depends on the surface you’re mounting to.
-
Rubber-coated magnets work on confirmed steel roofs
-
VHB Landing Pads are usually the better choice for aluminum or composite panels
-
Suction mounts can work on glass or smooth fiberglass surfaces for temporary setups
Before attaching anything, clean the mounting area with isopropyl alcohol. Adhesives and suction mounts won’t hold well on a dusty or oily surface. If you’re using VHB Landing Pads, give them about 24 hours to cure before driving.
Also add medium-strength threadlocker (Loctite 243 or similar) to mounting bolts before tightening them down. Trucks vibrate more than stationary setups, and threadlocker keeps the hardware from backing out over time.
Step 3: Attach the Dish

Once the mount is secure, place the dish into the mount and lock it in according to the mount design. Give it a quick stability check. Push on the dish from different directions. It shouldn’t shift, rock, or move around.
Before hitting the highway, take the truck for a short drive on rough pavement and make sure everything stays solid.
Protip: It is still possible to get a “tilt warning” inside the Starlink app if the dish is flat-mounted. That’s normal for vehicle installs and can be ignored! Additionally, Starlink is launching more and more satellites. The more satellites they have launched, the less tilting your Starlink dish helps service speeds.
Step 4: Run and Seal the Cable

Most truck installs can route the cable without drilling into the vehicle, which is ideal. Common entry points include:
-
The rear sliding window frame
-
A sunroof or moonroof gasket
-
The door jamb rubber seal
Try to keep the cable run as short and clean as possible. If any part of the cable runs outside the vehicle, protect it with braided sleeving so it doesn’t get damaged by UV or road debris. Also make sure the cable isn’t pinched anywhere. A pinched Starlink cable will eventually fail!
Step 5: Power Up Starlink in Your Truck

The Gen 3 Starlink system typically draws around 75–100 watts, so you’ll want to think through your power setup. Many truck installs use one of these options:
-
DC conversion, which runs power directly from the truck’s electrical system
-
The vehicle’s 12V outlet for simple setups
-
A battery and inverter setup for off-grid use
If you use an inverter, make sure it's a pure sine wave. Modified sine wave inverters usually won’t power the Starlink system correctly.
Common Mistakes to Avoid
-
Mounting too low. A dish blocked by the cab structure, a camper shell, or a roof box will show reduced signal or constant obstruction warnings. Use the app obstruction scanner before finalizing position.
-
Underestimating highway wind force. Stick your arm out the window at 70 mph, that lift force acts on your mount continuously. Improvised and magnetic-only setups have separated from vehicles at speed. Use hardware rated for this load.
-
Poor waterproofing. Any penetration point that isn't sealed will eventually admit water. Seal cable entry points with Dicor lap sealant. Water intrusion is a much harder problem to fix than doing it right the first time.
-
Skipping threadlocker. Vibration loosens hardware over time. Apply it during the install, not after you notice a loose bolt on the highway.
-
Ignoring the obstruction check. Starlink's growing satellite constellation has reduced sensitivity to peripheral obstructions, but a dish buried behind a camper shell or roof rack still needs clear sky directly above. Run the app scan before you commit to a position.
______
Additional FAQs: Starlink Truck Mounting Questions
Can I use Starlink while driving?
Yes, on the Starlink Roam 100 plan. The Gen 3 Standard or Mini dish, flat-mounted on a truck roof, delivers consistent service at highway speeds. Real-world installs confirm speeds of 80–278 Mbps while in motion. The dish handles its own orientation, you don't have to do anything.
What is the best mount for Starlink Mini on a truck?
The Mini Speedmount is the right option: it surrounds the dish with a protective frame, mounts via magnets, VHB pads, or suction cups depending on your surface, and lets you remove and remount without tools. For mid-size trucks where the Mini is the right dish size, a bed rack install with VHB Landing Pads is the standard approach. Full install walkthrough in the step-by-step Mini Speedmount guide.
Will wind damage the dish?
A properly mounted dish handles highway speeds without issue. The Gen 3 Standard dish is designed to lay flat in motion, which reduces wind surface area significantly. The risk is not wind damaging the dish; it's a compromised mount failing under wind load. Starlink's installation guidance specifically calls for secure tethering on vehicle installs. A mount rated for the load, properly torqued with threadlocker, stays put.
How much power does Starlink use?
The Gen 3 Standard dish draws an average of approximately 99W, ranging between 87–159W. The Starlink Mini draws less, and a recent firmware update reduced Mini power consumption by approximately 20–25%, making it a more viable option for battery-dependent setups. [Source: Tucks' Truck technical documentation + Starlink Mini firmware update notes]
Does Starlink work in forests or mountains?
The Gen 3 handles obstructions considerably better than Gen 1 and Gen 2. If the sky directly overhead is clear, the signal stays strong even with trees in the periphery. Dense overhead canopy is a different situation, but a truck parked in a clearing with a treeline 50 feet away performs well. Starlink's growing satellite constellation continues to reduce gaps in coverage in mountainous terrain.
Is it Safe to Drive With Starlink Mounted?
The short answer is yes, with the right mount.
Starlink's official installation guidance notes that mounts are not designed for high-wind environments and that tethering should be used on vehicles. That means whatever you're using to secure the dish to your roof needs to handle the actual forces involved, not just hold it in the driveway.
Wind force at highway speed is significant. At 70 mph, there's meaningful lift acting on any flat surface mounted above the roofline. The hardware securing your dish needs to be engineered for that load, not sourced from a hardware store.
For storage while driving: if you're on a non-Roaming plan or prefer not to run the dish in motion, the Gen 3 dish and a Flatmount stay secured to the roof with no action required: the flat profile keeps wind exposure minimal. If you're using a temporary or removable setup, stow the dish inside the cab before highway driving.
-


