






Ever heard this one? Your Starlink arrives in the mail, gets unboxed, then sits there for weeks while you wait for a free afternoon to finally get up on the roof.
You're not the only one. You're just missing the knowledge nobody usually shows you: what the install actually looks like in real time.
One RV owner filmed his own Mini Speedmount install, from the moment he opened the box, to the moment the dish was sitting on his roof, cured and ready to travel. There were no editing tricks, no skipped steps — just a guy with an Allen key and a roll of degreaser wipes.
https://www.youtube.com/watch?v=axIg6GQ93O4
Here's what a Starlink install actually involves, and how long it takes, step by step.
What's Actually in the Box
Before any tools come out, it helps to know what you're working with.

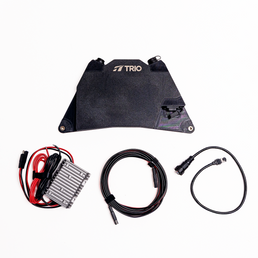
TRIO's Mini Speedmount ships with:
- One mount (2 curved mount halves that wrap around a Starlink Mini dish)
- Set of stainless steel bolts
- Hex key
How does it attach to an RV roof? That entirely depends on what the surface you're attaching it to is made of (e.g., glass, aluminum, steel, etc.).
Depending on which attachment option you ordered, a mount setup will also have:
- Rubber-coated magnets
- Suction cups
- VHB adhesive landing pads
In the case of this video, the kit included magnets paired with adhesive-backed steel discs — a combo built for roofs that aren't naturally magnetic.
(And just in case you're wondering, the whole unit weighs less than two pounds and stands under two inches tall, made from UV-resistant, injection-molded plastic.)
Step One: Put the Mount Together (A Couple Minutes)
The first stage of the install happens nowhere near the roof.
The two mount halves slide around the Starlink Mini dish and get bolted together with the included hardware and hex key — no drill, no separate toolbox required.
Independent reviewers who've tested the mount separately echo the same thing: assembly is straightforward. Just slide the pieces into place and tighten the bolts into the nylon locknuts.
Pro tip: If you want to drill the mount into your roof or a surface, you can MacGyver your heart out. Just know that this mount's warranty doesn't cover damages done by extracurriculars, like modifications and drilling.
Step Two: (Maybe) Get the Roof Ready
This is the step that actually eats up most of the clock, and it has nothing to do with the mount itself.
Before anything gets stuck down, the roof needs a genuinely clean, grease-free spot. In the video, there was some wiping down a section of the RV roof until it was free of road film and residue, since the adhesive discs and magnets only perform as well as the surface they're bonded to.


TRIO's own guidance backs this up directly: for roofs that aren't magnetic, the fix is to pair professional rubber-coated magnets with adhesive-backed steel discs, which bond to non-magnetic surfaces like aluminum or fiberglass using 3M VHB adhesive once the surface is properly prepped.
Step Three: Stick It Down (That's It!)
With a clean landing zone ready, the actual placement takes seconds.
Each adhesive disc gets its backing peeled away and pressed onto the roof, the magnetic mount drops into place on top, and firm hand pressure locks it down.
TRIO recommends weighing the mount down for a full day to let the adhesive fully cure before regularly flexing it at highway speeds — though you'll notice immediately how sturdy the mount feels in the moment. In the footage, that's exactly what happens.
Pro tip: Make sure you confirm with your Starlink app that the place you're sticking it to is positioned where it can achieve optimal signal strength in most scenarios!

So How Long Did the Whole Thing Actually Take?
Our attempt at a Starlink mount installation, from construction to sticking it correctly to the RV, took roughly 8–9 minutes.
Technically, allowing the adhesive to cure properly will take another 24-72 hours, if you are in fact using VHB discs. This obviously doesn't apply for pole mounts or suction cups.
Our experience lines up with what other RV owners have found after living with the mount for months. One reviewer who installed the Speedmount on a fiberglass truck camper called the whole project "pretty easy," describing it as a weekend project that could be finished within a couple of hours (including running the power cable into the rig, not just mounting the dish).
Quick Questions Before You Start
Do I need any special tools to install the Mini Speedmount?
No. The kit includes the hex key and stainless bolts required for assembly, and attaching it to your roof needs nothing beyond a clean surface and, depending on your chosen accessory, a few minutes for adhesive to set.
What if my RV roof isn't magnetic?
You can pair rubber-coated magnets with TRIO's adhesive-backed steel discs, which create a magnetic surface on aluminum, fiberglass, or other non-ferrous roofs (i.e., no iron), so the mount still attaches and stays removable.
How long should I wait before driving after installing?
For the strongest hold on a TRIO Speedmount or Mini Speedmount, apply firm pressure to the mount and let any adhesive discs cure, ideally under light weight, for at least 24 hours before regularly driving at highway speeds.
Can I reposition the mount after it's installed?
Yes, if you're using the magnetic attachment. The magnets themselves lift and reposition easily — it's only the adhesive discs beneath them that are meant to stay put once placed. (You can remove them with hot air and effort, just know that will take time. Position carefully using your Starlink app to check for signal strength first!)


