


Picture this: you're 25 miles offshore, the water is glassy, the fish are biting, and you're streaming a live weather update while your crew argues about lunch on a group chat. No lag. No dropped signal. Just open ocean and internet that actually works.
That's not a fantasy. That's Starlink on a boat… when it's set up right.
Here's the part nobody tells you before you buy: the dish works. The technology is real. Latency sits at 20–40ms compared to the 500–800ms you'd get on legacy VSAT, and plans start at $50 a month versus the $5,000 or more that offshore connectivity used to cost. Functional connectivity has been documented at 30+ miles offshore on center consoles. This basically means the hardware isn't the problem.
The problem is everything that happens before you leave the dock. Plan selection, mount placement, power setup, one setting you have to toggle before you lose signal; these are the decisions that separate a setup that runs quietly in the background from one that ruins your trip.
This is what you need to know.
Mistake #1: Paying for Maritime When You Don't Need It
The most expensive mistake recreational boaters make isn't choosing the wrong dish. It's overpaying for a plan that has nothing to do with how they actually use the water.
Roam vs. Maritime: What You're Actually Buying
Starlink offers two plan paths for business boaters: Roam and Maritime. Roam runs $50/month for 100GB or $165/month unlimited. Maritime Priority starts at $250/month, comes with priority data, and is built for vessels spending serious time offshore in motion.
The price gap is real. So is the performance gap, but probably not in the direction you'd expect.
At anchor nearshore, Roam performance was comparable to Maritime Priority in practical use. Community consensus across forums like FetchinKetch, MIRC, and SeaPeople points in the same direction: Maritime is built for commercial operators and serious offshore passage-makers, not the weekend angler running 20 miles out on a Saturday morning.
For most recreational boaters, there's a smarter middle option.
When Ocean Mode Is the Better Call
Ocean Mode lets Roam subscribers extend coverage beyond 12 nautical miles offshore at a $2/GB surcharge. It has limits: 60 days per year, five consecutive days at a time, but for the typical offshore fishing trip or occasional blue-water passage, those limits are more than workable.
Run the math: a dozen offshore trips a year using 5–10GB each comes out to $10–20 per outing in Ocean Mode charges. That's a fraction of the monthly gap between Roam Unlimited and Maritime Priority.
One catch, though. Ocean Mode can't be activated from offshore. It has to be enabled before you lose signal. Which brings us to the next mistake.
(TRIO's Starlink plan comparison guide walks through the Roam vs. Maritime decision in full detail.)
Mistake #2: Not Toggling Ocean Mode Before You Leave Shore

This one trips up even experienced Starlink users. It's completely preventable. And almost nobody warns you about it before your first offshore run.
Here's what happens: you're on Roam, you've read that Ocean Mode extends your coverage past 12 nautical miles, and you figure you'll toggle it on once you get out past the shelf. What you discover offshore (no signal and a Starlink app that won't load) is that enabling Ocean Mode requires logging into your Starlink account. Which also requires completing two-factor authentication via email. That email never arrives because, you guessed it, you have no connectivity.
This isn't a bug. It's how the system works. Ocean Mode must be enabled while you still have a cellular or Starlink signal before you leave shore. Once you're past the 12 nautical mile boundary without it active, your offshore coverage window is gone.
The fix is simple: check Ocean Mode status before every offshore departure. Open the Starlink app at the dock, confirm it’s active, then go. Five seconds on land = hours saved at the sea.
Mistake #3: Mounting in the Wrong Spot
Plan selection is the first performance variable. Mount placement is the second, and on a moving boat in open water, it may matter more.

The 100-Degree Sky View Rule
Starlink needs a clear, unobstructed 100-degree cone of sky above the dish. On a boat, that’s harder than it sounds. T-tops, outriggers, hardtops, radar arches, antennas… they all compete for the same airspace. Partial obstructions cause interruptions ranging from 10–15 seconds to several minutes, depending on how much of the sky view is blocked. The software switches satellite paths in 0.1 seconds. But it can only work with the geometry it has.
Worth noting: Starlink's constellation density has improved significantly since 2022, and the system is more forgiving of partial obstruction for casual use. For anything work-critical (video calls, file transfers, time-sensitive connections) placement still matters. Don't compromise it.
Sailboat-Specific Placement Challenges
Sailboats have obstruction patterns that shift as the boat tacks. The mast, boom, and standing rigging create shadows that change with every heading. This is a real-world performance issue when the dish is mounted too low or too forward, simply because speed drops correlated directly with rigging interference.
The preferred mounting positions for Starlink for sailboats stern arch, pushpit rail, or a position above boom level. Essentially anywhere that gets the dish clear of the primary rigging lines regardless of heading.
What a Proper Marine Mount Actually Does
Most conversations about Starlink mounting focus on location. They should also focus on hardware because the mount itself is doing real work.
A proper Starlink mount for boat applications holds the dish flat and stable under throttle, wave action, and wind load. It manages vibration that stresses the cable connection over time. And in a saltwater, hardware that wasn't built for marine exposure will corrode. Not just inconveniently. Catastrophically, and (probably) at the worst possible moment.
TRIO's proprietary survey data on mobile Starlink users, including boaters and offshore anglers, consistently identifies mount stability and corrosion resistance as top concerns among users who've already dealt with the alternative.
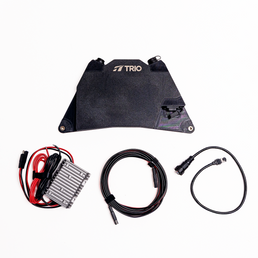
For fiberglass boats specifically, the TRIO Mini Interior Mount paired with VHB Adhesive Backed Magnet Mounting Discs and Rubber Coated Magnets is the cleanest no-drill solution available.
The VHB discs bond permanently to the fiberglass surface. The rubber-coated magnets snap onto the discs and hold through wave action, throttle, and saltwater conditions. Simple: just a dish that stays where you put it.
Mistake #4:Underestimating What Starlink Does to Your Power System

Starlink is not a passive piece of gear. It draws continuous power, and the way most boats supply that power is less efficient than it needs to be.
Standard Dish vs. Starlink Mini — The Power Gap Matters Offshore
The Standard Starlink dish draws 25–60W on average, with peaks up to 100W during snow melt mode (though that's rarely relevant on a boat). Maritime/Performance dish runs 90–150W average, roughly 150% more than the Standard.. Eight hours of daily use on either dish adds up to approximately 400 Wh of consumption. That’s comparable to running a small marine refrigerator.
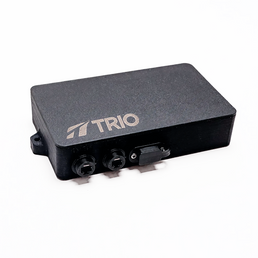
The Starlink Mini changes this math. At 20–40W native 12V, it draws less power than any other dish in the lineup and runs directly off 12V DC without conversion hardware. For battery-dependent boats without a generator or large alternator, that's definitely not a minor spec. It's a genuine deciding factor.
Why Native DC Is the Smart Marine Choice
Most boat electrical systems run on 12V DC. Starlink's Standard dish, designed for residential AC power. That means most boat installations route the dish through a DC-to-AC inverter, which wastes 10–30% of the energy they convert (according to Seabits’ power testing). On a battery-dependent setup, that loss is significant.
Two ways around it: use the Starlink Mini (natively 12V), or install the optional DC power kit for the Standard dish: A minimum of 10 AWG wiring and a 20A fuse is recommended for any direct DC installation. Running the Standard dish at 12V draws approximately 4 amps: totally manageable load when wired correctly.
Native DC is cleaner, more efficient, and less vulnerable to inverter failure offshore. For any boat running on battery power, it's the right call.
Mistake #5: Dismissing the Starlink Mini for Serious Marine Use
The Starlink Mini is the smallest dish in the lineup. It's also the most underestimated. Boaters assume smaller means weaker, but the real-world data doesn't support that assumption.
Starlink doesn’t officially market the Mini for marine use. The community has figured it out anyway. Forum threads include multiple reports of the Mini performing reliably at 50–60 miles offshore. Travel Sketch Sailing's nine-month liveaboard review documents sustained use through coastal and offshore sailing, and not a single test run: actual passage miles.
The case for the Mini in a marine context comes down to three things:
-
Native 12V power draw (20–40W) makes it the most battery-friendly dish in the lineup.
-
A smaller form factor is easier to mount on smaller vessels with limited real estate.
-
Price point is considerably lower than the Performance or Maritime hardware tiers.
For Starlink for offshore fishing use like day trips, weekend runs, the occasional longer passage, the Mini is worth serious consideration. Community-validated, not officially endorsed. Sometimes that’s the more reliable data point.
And for fiberglass boats, the mounting question was solved previously in this same article: TRIO's Mini Interior Mount is built specifically for the Starlink Mini. Just snap it on and go fish.
One Mistake Nobody Talks About: Starlink Is Not a Safety Device
Starlink is not a SOLAS-certified safety device. That's not a technicality. It means that maritime safety authorities do not recognize Starlink as a reliable emergency communication system, and for good reason. In September 2023, Starlink experienced a documented global outage, that took the network offline for users worldwide.
No warning. No partial service. Offline.
Starlink is a connectivity tool. A very good one. But a damaged dish, a power failure, or a network outage ends your connection instantly. A dedicated emergency communication system like VHF radio, an EPIRB, a personal locator beacon, or a satellite communicator, operates independently of the Starlink network and doesn't share its failure modes.
Carry a backup. Every offshore departure. No exceptions.
Bonus: Check the Regulatory Map Before International Passages
For coastal cruisers and offshore sailors planning international passages, there's one more variable that most boating content completely ignores: Starlink isn't legal everywhere.
According to Sailoscope's international regulatory data, Starlink service is currently banned in Russia, Iran, and China. Service disruptions have also been reported near Turkey. Sailing into restricted waters with active Starlink equipment could create real legal problems, and "I didn't know" is not a useful defense offshore.
Before any passage that crosses international waters, consult the Sailoscope regulatory map and verify Starlink's current operating status in every country on your route. This takes ten minutes of planning. The alternative takes considerably longer to resolve.
Secure Your Starlink Before You Leave The Dock
- Pick the right plan.
- Enable Ocean Mode before you lose signal.
- Mount the dish where it has sky.
- Wire it for DC.
- Don’t mistake a great connectivity tool for a safety device.
The difference between a setup that just works and one that frustrates you offshore isn’t usually the hardware. It's five decisions made before you cast off.
If your dish still needs a home, TRIO Flatmount builds Starlink mounting systems designed specifically for boats and the conditions they actually face. No drilling. No compromises. Shop TRIO's marine mounts and get your Starlink locked in before the next trip out.
And, if you ask us, the only thing you should be troubleshooting offshore is why the fish aren't biting.


