


If you’ve ever watched your Starlink dish wobble or tip in the wind, you’re not alone. Most of us started with the stock tripod. It’s simple, works fine when stationary, and gets the job done for testing or temporary setups.
But when your Starlink starts traveling with you, whether on a van, RV, or boat, the tripod starts showing its limits. It’s tall, prone to movement, and not built for motion. That’s why many users eventually look for something more stable, especially once they start using Starlink in more mobile or weather exposed environments.
This isn’t about selling a replacement. It’s about using the right tool for the job.
When a Tripod Still Makes Sense
A tripod is perfectly fine for home use, cabin setups, or short term stays. It’s portable, lightweight, and easy to set up. For some users, especially those camping occasionally or testing Starlink for the first time, a tripod can do a great job.
However, if you regularly move your dish between locations, for example between a house and a vehicle, a mount is usually the better choice. It saves setup time, stays more secure, and eliminates the need to constantly reposition the dish.
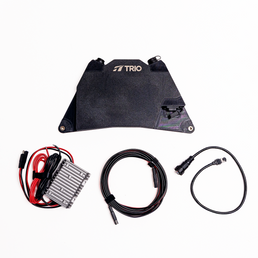
Image from link
Why Low Profile Mounts Became the Go To
A low profile mount, often called a flatmount, keeps the dish secure and close to the surface. Instead of balancing on legs, it sits flush to the roof, reducing wind drag and eliminating wobble.
That doesn’t just look cleaner. It’s safer and simpler. No daily setup, no guessing if the tripod will hold, and no risk of your Starlink taking flight down the highway. Whether you’re driving, boating, or parked in high winds, the right mount turns your dish into a fixed, reliable part of your setup.

How to Choose a Mounting Setup That Fits Your Needs
1. Start With Your Starlink Dish
Starlink Mini
If you are using the Starlink Mini, these mounts are available:
-
Mini Speedmount which offers a low profile design and quick removal
-
Mini Flatmount which provides a clean and streamlined base for permanent or semi permanent installs
Both options give the Mini a stable connection and eliminate wobble, tipping and any leveling issues that come with tripods.

Standard Gen 3
For the Standard Gen 3 dish, you can choose between:
-
Gen 3 Speedmount which allows easy removal and repositioning
-
Gen 3 Flatmount which sits close to the surface for a clean and simple appearance
Both options remove the need for a tripod and create a solid, fixed platform for the dish.

Performance Gen 3
This dish is larger and heavier. The compatible mount is:
-
Performance Gen 3 Speedmount which uses reinforced composite materials for maximum strength and long term stability
This mount replaces any temporary hardware like tripods and is built to support the size and weight of the Performance dish.

2. Choose the Attachment Based on Your Mounting Surface
After you choose the mount for your Starlink dish, the next step is selecting the attachment that matches your surface. Each attachment method provides a different level of strength and removability.
VHB Landing Pads
Adhesive pads create a strong and permanent base for your mount. They use high bond 3M VHB adhesive that resists heat, rain and vibration.
Good for permanent or semi permanent installs where you want a clean footprint.
Rubber Coated Magnets
Magnets give you a strong and removable hold without drilling or adhesive. They are fast to install and easy to remove.
Good for metal surfaces and setups that require flexibility or frequent removal.
You can add Swivel Leg Mount Adapters to help level the mount on curved or uneven surfaces.

VHB Adhesive-Backed Magnet Mounting Discs
These adhesive discs turn non magnetic surfaces into magnetic ones. Once installed, the mount can attach using magnets as if the surface were metal.
Good for fiberglass, aluminum and any surface where magnets would not normally stick.

Suction Cups
Suction attachments work on smooth surfaces for temporary setups. They hold securely and remove cleanly when needed.
Good for glass, finished panels and short term installs.

Through Bolting
Every Trio mount has bolt points that let you fasten it directly to the surface with hardware.
Good for the strongest and most permanent installs where movement, weather or vibration are constant factors.

Final Thoughts
A tripod is great when you’re getting started. It’s simple, flexible, and easy to move. But as your Starlink setup becomes part of your daily life, it’s worth considering low-profile Starlink mounts purpose built for motion and weather.
Whether you build your own mount or use a ready solution, the key is safety, simplicity, and confidence in your connection. Because once your internet becomes part of your travels, it shouldn’t be the weakest link in the adventure.


