
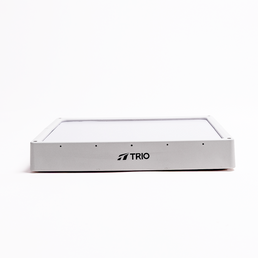


If you’ve ever tried to run Starlink off your RV, van, or truck setup, you’ve probably faced the same headache. Too many cables, too many boxes, and a power inverter that drains your battery faster than it should.
We’ve seen it over and over again. The setup works, but it’s not efficient. Inverters waste energy, wiring gets messy, and you end up spending more time troubleshooting than actually using your connection.
There is a better way. Powering your Starlink (whether it's a Gen 3 Standard or a Mini dish) from 12v or 24v is actually really easy with plug and play kits. However, there are many different ways to do the conversion, and some are a better fit than others.
Why It Matters on the Road
When you rely on Starlink for work, navigation, or staying connected, downtime isn’t an option. This kit keeps your system running efficiently whether you’re driving cross-country, camping off grid, or setting up a mobile office in remote terrain.
It’s efficient, quiet, and designed for people who want to focus on their trip, not their wiring.
The Problem with Traditional Starlink Power Setups
Most mobile Starlink users start with a basic inverter setup. An inverter converts 12v battery power into 120v "house" power so you can easily plug in the Starlink. It works, but it’s not designed for long-term efficiency.
Every time power is converted from DC to AC and back to DC, energy is lost as heat. That means shorter battery life, more charging cycles, and more noise from inverters running around the clock.
Over time, it turns into a cluttered setup that’s hard to maintain and frustrating to manage with cables everywhere. Then, to turn it off requires physically unplugging it (vs a more convenient switch). We kept hearing the same things from Starlink users everywhere:
• “My inverter kills my battery too fast.”
• “Too many cables and boxes.”
• “Why can’t this just run straight from 12 V?”
That's valid. There's a lot of ways to convert to 12v so you can save power and make your install cleaner.
Best Options For 12v Powering
Starlink Gen 3 Standard
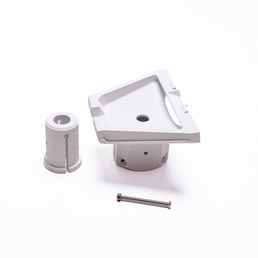
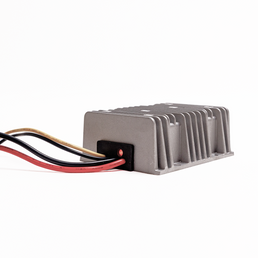
1) Simple 12v Conversion with a Gen 3 Power Supply
This is by far the easiest way to convert a Gen 3 Standard dish to 12v. There are 2 connections on the TRIO Gen 3 Power Supply; Starlink OEM Router and 12v/24v power (red and black wire).
It's totally plug and play; just plug the barrel connector into the back of the OEM Starlink router. Then connect the 12v/24v side of the power supply to a battery. It's also easy to wire in a switch. You can use almost any switch rated for 12v/24v and 5 amps. Just interrupt the positive or negative wire on the 12v/24v side.
Most importantly, it's custom built for us and has a capacitor that significantly smooths our voltage irregularities, increasing Starlink uptime.

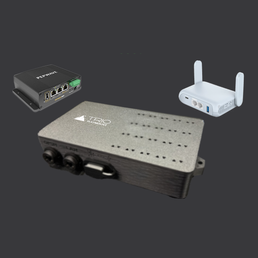
2) Using Aftermarket Router
If you need a failover type router, Peplink makes popular routers that accept a cell SIM card for additional coverage. Alternatively, you might want to use an upgraded aftermarket router with stronger security or broadcast settings. TRIO's Gen 3 12v Conversion Box actually allows you to run an aftermarket router with the Starlink.
Typically, that doesn't work because Starlink requires a PoE (Power Over Ethernet) connection to run the dish from a single cable. Most aftermarket routers don't have PoE connection. Indirectly, this 12v Conversion Box allows you to run the Starlink from 12v/24v.
However, if you don't need an aftermarket router, this device won't have as much benefit as the simpler Gen 3 Power Supply.
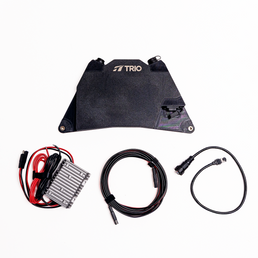
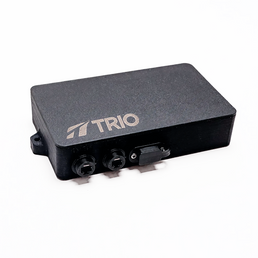
3) Best Option for Compact Setup
The All In One 12V Conversion Kit (AIO) is a purpose-built device designed to eliminate those problems completely. It lets you run Starlink directly from a 12V power source without an inverter, saving energy and space while keeping your setup clean. The WiFi router is built into the AIO unit which eliminates the need for the OEM Starlink router.
Wish you got the Mini? Want the power and performance of the Gen 3 dish? The All In One actually combines the best of both worlds. It’s a true plug-and-play solution that replaces multiple components with one smart unit.
The AIO kit gives you:
-
Simpler wiring with fewer connection points
-
Better battery efficiency and longer runtime
-
Less heat, less noise, and no wasted power
-
A cleaner, more professional installation


Starlink Mini
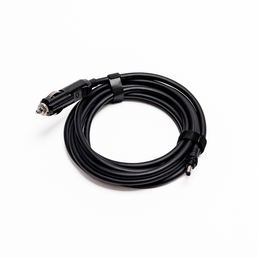
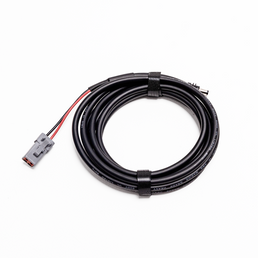
A more durable cable can actually increase uptime. Since the Mini runs natively on anywhere between 12v and 48v, you can connect directly to your battery! That said, low voltage connections are susceptible to voltage drop. You can learn more about voltage drop from this TRIO video, but TLDR: a heavier gauge cable (14 awg or above) can actually increase uptime, because more voltage is delivered to the Starlink dish.
If your setup is temporary, we have Mini cables that plug into cigarette lighter, ring terminal direct to battery, and bare wire so you can make your own connection. All are heavy duty 14 awg real copper cable so you know you're getting a good electrical connection.
Real World Benefits
People who’ve switched to a 12V system say it’s one of the biggest upgrades they’ve made. No more voltage drops, no more battery drain overnight, and no more tangled power cords taking up storage space.
Here’s what Scho and Jo had to say after installing the 12V conversion on their Sprinter with the Speedmount:
"We installed the 12V conversion on our Sprinter with the Speedmount, and it performs flawlessly. We were recently in a high wind zone, with gusts over 70 mph, and we had no issues while driving.
Since the 12V conversion is low power, we leave our Starlink on 24/7 most of the time. The Starlink itself is fast and reliable, everything you want for mobile internet. We highly recommend the conversion kit and speed mount.”
Final Thoughts
Converting to 12v is basically table stakes for a mobile Starlink install. It takes an unwieldily Starlink dish (designed for home installation) and makes it easy to use while on the road.


