
Frequently Asked Questions
WILL MY STARLINK'S WARRANTY BE VOID?
No it won’t void the warranty.TRIO mounts and accessories do not require any physical modifications to your Starlink.
DO YOU SHIP INTERNATIONALLY?
Yes! Your shipping quote will be updated during checkout. If you have any difficulty please contact us directly at contact@trioflatmount.com
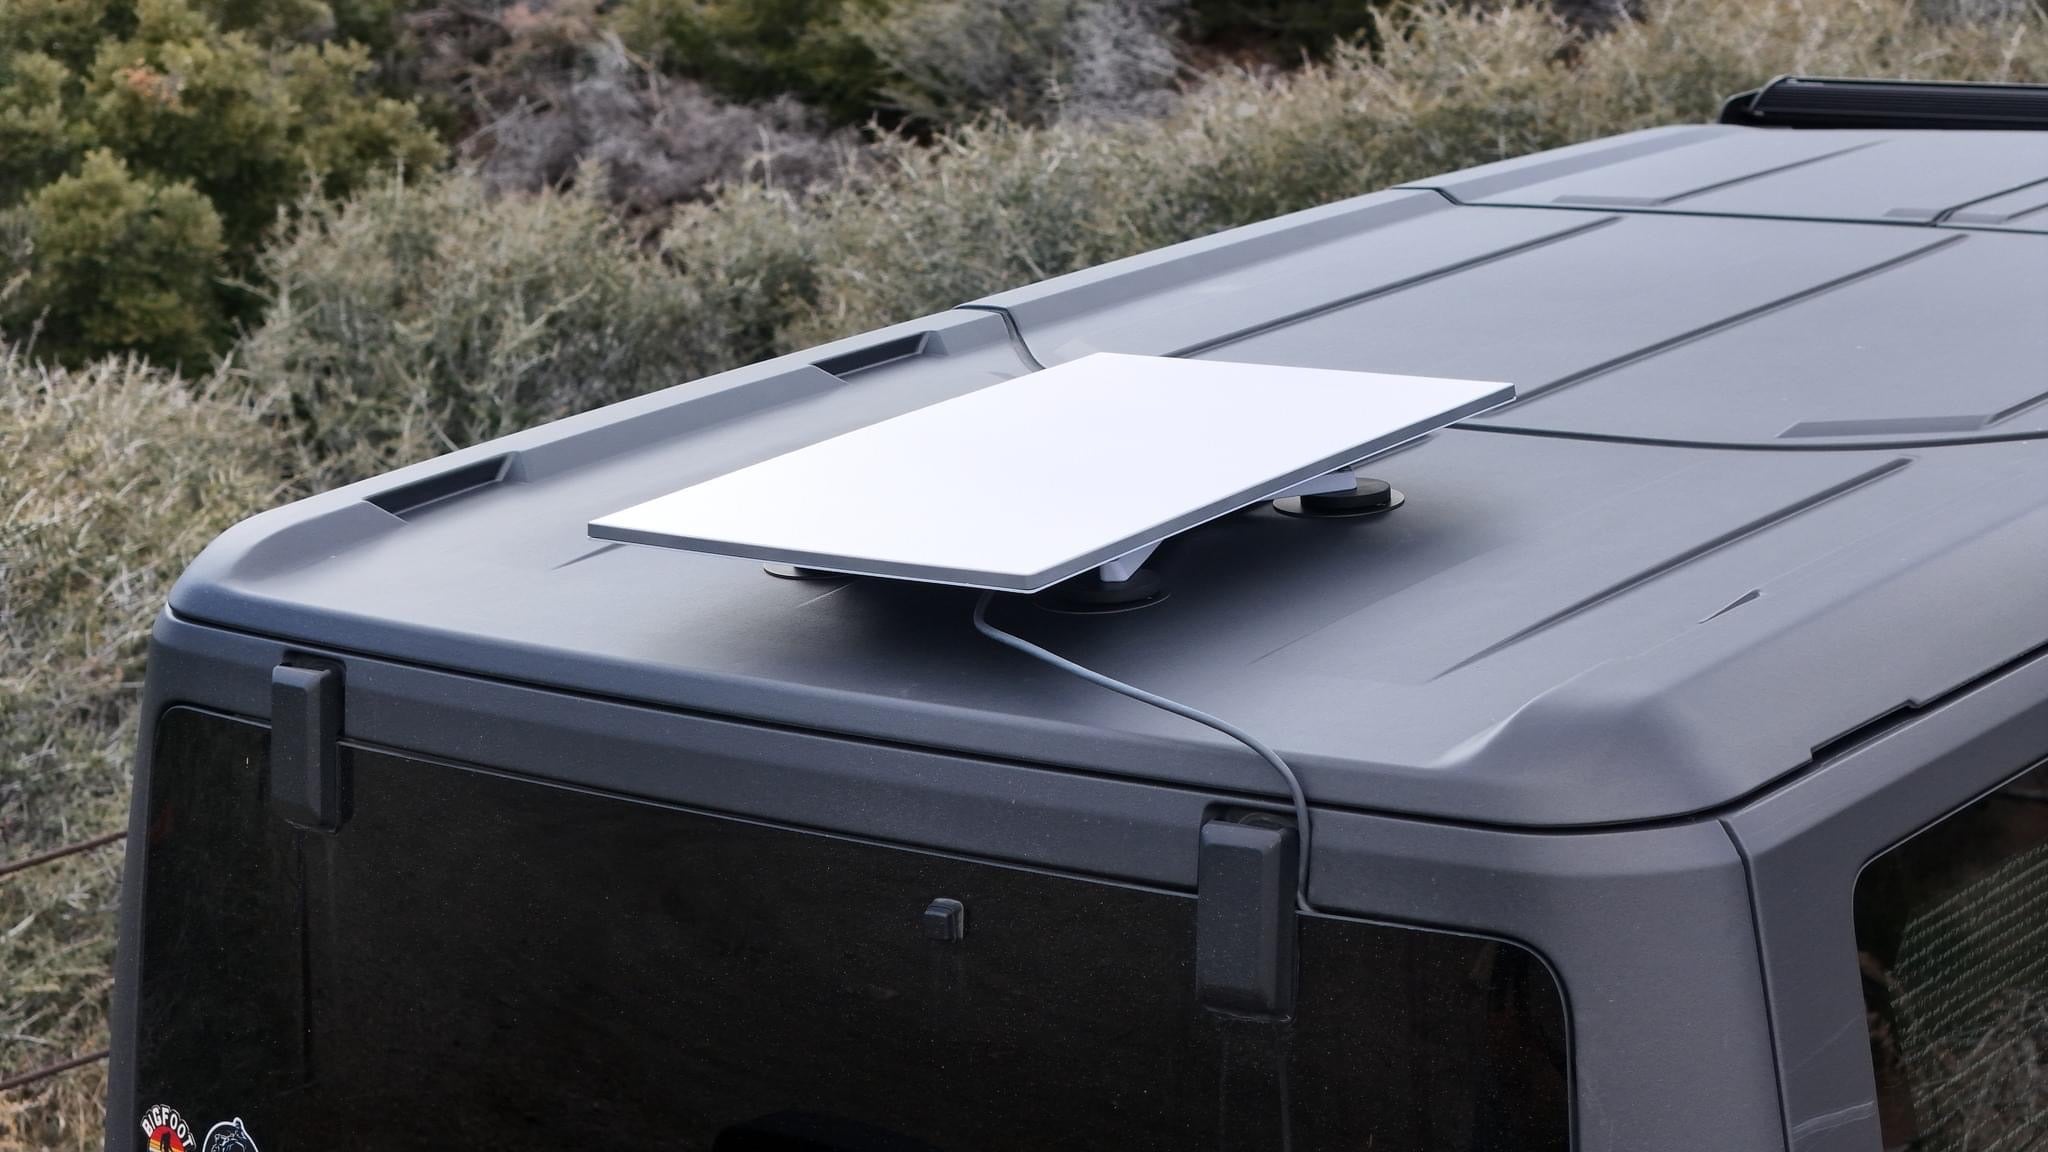
CAN THE MOUNTS BE LEFT OUTSIDE?
Yes!Our mounts are manufactured from the same UV resistant thermoplastic (ASA) that is used in automotive manufacturing (such as bumpers, fenders, mirror housings, etc.) and can be left outside without any concern of deterioration or discoloration regardless of weather.
WHAT IS YOUR RETURN POLICY?
All sales are final. Each item is carefully inspected before being sent off to you!
We accept returns or exchanges for products damaged in transit or if the incorrect item was shipped to you.
Refunds and exchanges: To be eligible for a refund or exchange, you must email us (contact@trioflatmount.com) within 30 days of placing your order. Upon receipt of your email, we will arrange for the return of the incorrect item. Once the item is received, the replacement item will be sent. If a replacement item is not available, a refund will be issued.
If you need to cancel your order, please email us immediately and we will do our best to accommodate your request. Please note that cancelled orders will be subject to a 5% fee to cover credit card / Paypal fees of the transaction.
Your satisfaction is our number one priority! Please let use know how we are doing and how we can improve. All sales are final. Each item is carefully inspected before being sent off to you!
We accept returns or exchanges for products damaged in transit or if the incorrect item was shipped to you.
Refunds and exchanges: To be eligible for a refund or exchange, you must email us (contact@trioflatmount.com) within 30 days of placing your order. Upon receipt of your email, we will arrange for the return of the incorrect item. Once the item is received, the replacement item will be sent. If a replacement item is not available, a refund will be issued.
If you need to cancel your order, please email us immediately and we will do our best to accommodate your request. Please note that cancelled orders will be subject to a 5% fee to cover credit card / Paypal fees of the transaction.
Your satisfaction is our number one priority! Please let use know how we are doing and how we can improve.
IF SOMETHING HAPPENS TO MY DISH, WILL YOU REPLACE IT FOR ME?
While we perform thorough testing to ensure the safety and function of all our mounts, we are unable to control mounting surface preparation and actual installation. We are happy to provide support but won’t be present during your install. As such, we are unable to replace damaged Starlink dishes and/or mounts.
We are not liable for any damage caused to your property, property of others, or injury associated with mount failure and/or improper installation.
HOW DO I INSTALL THE DISH WITH THE TRIO MOUNT?
IMPORTANT NOTE: Many factors beyond TRIO Flatmount’s control and uniquely within user’s knowledge and control can affect the use and performance of a mounting product in a particular application. Given the variety of factors that can affect the use and performance of a TRIO Flatmount product, user is solely responsible for evaluating the product and determining whether it is fit for a particular purpose and suitable for user’s method of application.
__________
Through Bolt:
1. Place TRIO flatmount on top of desired mounting surface. Use a sharp pencil to mark each of the 4 holes onto the surface.
2. Drill through the marks using appropriately sized drill bit (M6 bolts used for gen 3 mounts). If drilling through metal, be sure to file and use a primer/paint to prevent rust from forming on the exposed metal before moving forward.
3. Feed bolts through spaces at each of the 4 feet on the TRIO Flatmount and through the drilled mounting surface. THE TRIO FLATMOUNT LOGO (AND DISH CORD) SHOULD BE POINTED TOWARDS THE BACK (TRAILING EDGE) OF YOUR VEHICLE/BOAT/RV ETC.
4. Slide washer and locknut onto the end of each bolt and tighten using the hex key provided and a wrench.
5. Slide the Starlink dish onto the TRIO Flatmount until it clicks firmly into place and make sure it is secure… and enjoy your internet!
__________
Magnetic Feet:
1. Feed bolts (blue loctite already applied) through spaces at each of the 4 feet on the TRIO Flatmount
2. Thread the screws into the magnets and tighten using the hex key supplied.
3. Slide the Starlink dish onto the TRIO Flatmount until it clicks firmly into place and make sure it is secure
4. Ensure your magnetic surface and the mounting magnets are clean and free of debris
5. Place TRIO flatmount onto magnetic surface and make sure there is good contact. THE TRIO FLATMOUNT LOGO (AND DISH CORD) SHOULD BE POINTED TOWARDS THE BACK (TRAILING EDGE) OF YOUR VEHICLE/BOAT ETC.
6. Enjoy your internet!
**When removing from the vehicle, lift from the rear portion of the mount itself rather than using the dish as a lever.
__________
Magnet & VHB backed magnetic mounting discs:
1. Feed bolts (blue loctite already applied) through spaces at each of the 4 feet on the TRIO Flatmount
2. Thread the screws into the magnets and tighten using the allen key supplied.
3. Attach one VHB backed magnetic mounting disc to each of the magnetic feet, ensuring each are free of debris.
4. PLEASE NOTE: the mounting substrate that your mounting discs will be stuck to should be non-porous and smooth. It is recommended to lightly scuff the surface you will be sticking the VHB discs to using a scotch pad. HOWEVER, do this at your discretion as doing so will scratch the finish of your mounting surface. Use isopropyl alcohol wipes to clean the scuffed surface you wish to secure the VHB mounting discs to.
5. Remove the red VHB sticker cover and carefully place the flat mount with the exposed VHB mounting discs onto the freshly cleaned surface. THE TRIO FLATMOUNT LOGO (AND DISH CORD) SHOULD BE POINTED TOWARDS THE BACK (TRAILING EDGE) OF YOUR VEHICLE/BOAT/RV ETC.
6. Apply firm pressure through the mounting feet to ensure adhesion. If possible, place heavy object on top of the mount for 24 hrs to optimize adhesion (ideal application temperature is 70-100F).
7. Slide the Starlink dish onto the TRIO Flatmount until it clicks firmly into place and make sure it is secure… and enjoy your internet!
**When removing from the vehicle, lift from the rear portion of the mount itself rather than using the dish as a lever.
__________
VHB Landing Pads:
1. Feed bolts (blue loctite already applied) through spaces at each of the 4 feet on the TRIO Flatmount
2. Thread the screws into the landing pads and tighten using the allen key supplied.
3. PLEASE NOTE: the mounting substrate that your landing pads will be stuck to should be non-porous and smooth. It is recommended to lightly scuff the surface you will be sticking the VHB discs to using a scotch pad. HOWEVER, do this at your discretion as doing so will scratch the finish of your mounting surface. Use isopropyl alcohol wipes to clean the scuffed surface you wish to secure the VHB pads onto.
4. Remove the red VHB sticker cover and carefully place the flatmount (with the exposed VHB pads) onto the freshly cleaned surface. THE TRIO FLATMOUNT LOGO (AND DISH CORD) SHOULD BE POINTED TOWARDS THE BACK (TRAILING EDGE) OF YOUR VEHICLE/BOAT/RV ETC.
5. Apply firm pressure through the mounting feet to ensure adhesion. If possible, place heavy object on top of the mount for 24 hrs to optimize adhesion (ideal application temperature is 70-100F).
6. Slide the Starlink dish onto the TRIO Flatmount until it clicks firmly into place and make sure it is secure… and enjoy your internet!
__________
Suction Cups:
1. Feed bolts (blue loctite already applied) through spaces at each of the 4 feet on the TRIO Flatmount
2. Thread the screws into the landing pads and tighten using the allen key supplied.
3. PLEASE NOTE: The mounting substrate that your suction cups will be stuck to should be non-porous, clean, and smooth. Inspect the suction cup to ensure it too is free of dirt and debris.
4. Place the TRIO flatmount with suction cups onto the freshly cleaned surface. THE TRIO FLATMOUNT LOGO (AND DISH CORD) SHOULD BE POINTED TOWARDS THE BACK (TRAILING EDGE) OF YOUR VEHICLE/BOAT ETC.
5. To attach, apply gentle downward pressure on the suction cups to ensure that the entire edge of the cup is touching the surface. Then, simply press the pump repeatedly until the colored indicator band completely disappears.
6. Slide the Starlink dish onto the TRIO Flatmount until it clicks firmly into place and make sure it is secure… and enjoy your internet!
** To remove the cups, lift the edge of the vacuum pad away from the surface by pulling the tab on the edge up and towards the center of the vacuum mount. You’re really just trying to lift the edge of the vacuum pad up off the mounting surface, which breaks the seal and lets you remove your mount.
OUR WARRANTY
Warranty:
Trio Flatmount warrants its branded products are free from defects in workmanship and
materials, under theirits intended use and conditions, for a period of six (6) months from the date of purchase (the “Warranty Period”). If such a defect arises with your Trio Flatmount branded product during the Warranty Period, Trio Flatmount will provide the necessary repair or replacement (at its option based on the defect presented), subject to the conditions below, at no
additional charge. Such repair or replacement is subject to verification of the defect or malfunction and proof of purchase as confirmed by showing the model number on original dated sales receipt In the event of a defect covered by this Warranty, to the extent permitted by
applicable law, the above is your sole and exclusive remedy. This Warranty is non transferable and excludes: (a) lost or stolen products; (b) damage or failure through normal wear and tear; (c) negligent or improper use; (d) any use contrary to instructions provided by Trio Flatmount;
(e) cosmetic damage (i.e., scratches, nicks or dents); (f) unauthorized modifications, alterations or repairs; or (g) external causes of damage or unauthorized commercial use.
Shipping, handling, package, and insurance charges may apply except where prohibited by applicable law.
Trio Flatmount is not responsible to repair or replace your product if you violate this Warranty. This Warranty gives you specific legal rights, and you may have other legal rights, which vary by jurisdiction. We do not exclude or limit other legal rights you may have under the laws of your jurisdiction.
EXCEPT FOR THE WARRANTY SET FORTH HEREIN, AND EXCEPT TO THE EXTENT
PROHIBITED BY APPLICABLE LAW, ALL PRODUCTS ARE PROVIDED ON AN “AS IS” AND “AS AVAILABLE” BASIS WITHOUT ANY EXPRESS OR IMPLIED WARRANTIES OR
CONDITIONS OF ANY KIND. WE HEREBY DISCLAIM ALL IMPLIED WARRANTIES AND
CONDITIONS, INCLUDING BUT NOT LIMITED TO THE WARRANTY OF TITLE, MERCHANTABILITY OR FITNESS FOR A PARTICULAR PURPOSE. IF IMPLIED
WARRANTIES CANNOT BE DISCLAIMED UNDER THE LAWS OF YOUR JURISDICTION,
THEN SUCH WARRANTIES ARE LIMITED IN DURATION TO THE DURATION OF THIS
WARRANTY.
Your use of any Trio Flatmount branded products is at your own risk, and you will be solely responsible for, and we expressly disclaim, any and all loss, liability or damage resulting from your use of any such product, including damage or loss to the product and any other items or accessories connected to the product.
SHIPPING RELATED CONCERNS
Stolen or lost packages that have been marked delivered or signed for are not the responsibility of Trio Flatmount. Trio Flatmount will do its best effort to work with the customer to locate the package(s).
Trio Flatmount cannot guarantee delivery dates. It is the responsibility of the customer to provide a suitable address upon checkout to receive the order.
The customer is responsible for any duty owing on delivery, if applicable. Should the parcel be returned to Trio Flatmount due to being refused, undeliverable or due to an address error, the customer will be refunded once the items are received back at Trio Flatmount office, MINUS any fees incurred by return shipping of the undeliverable parcel.
DO YOU HAVE AN AFFILIATE PROGRAM?
Yes, we do! Send us an email at contact@trioflatmount.com for more information.